I’ve enjoyed quilting as a creative outlet for nearly three decades. My mom’s mom was a quilter and a crafter. I was always inspired by her creativity and industriousness. Grandma Ruth and I spent a lot of time together in my youth, which motivated me to try different handicrafts.
I remember as a young wife and mother in my early 20s, I wanted to try quilting so I bought some fabric and made a bunch of little 12-14″ quilts. I took a (literal) stab at hand-quilting them—without much success. The fronts looked okay, but the backs were a mess. Grandma Ruth gave me some pointers on hand quilting, showing me how to rock the needle back and forth using a thimble to push several stitches through at a time.
I realized too late that I should have sought her advice before I quilted them all on my own. (This was about 10 years before Google was available to the public. How much easier it is today when a quick internet search brings up dozens of helpful websites and videos!) But Grandma Ruth came to my rescue, and I’m thankful for her helpful advice.
Fast forward to 2020. I retired from my work with the statewide homeschool organization this spring, and I’m thrilled to finally have time for creative endeavors like quilting.
Inspiration for my first quilt of the year
Now that I have some time and space to create, I’m ready to jump back into quilt-making. Inspiration for my first quilt struck a week and a half ago.
My dear friend Heather recently had a baby, and I learned she was going to be in town for a few days. Ahh! What a fun opportunity to get in some craft therapy and bless my friend and her new baby girl, too!
Day 1: Shopping for fabric
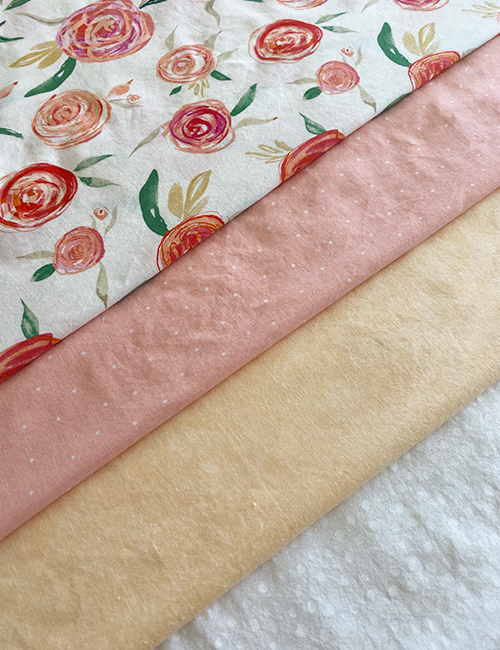
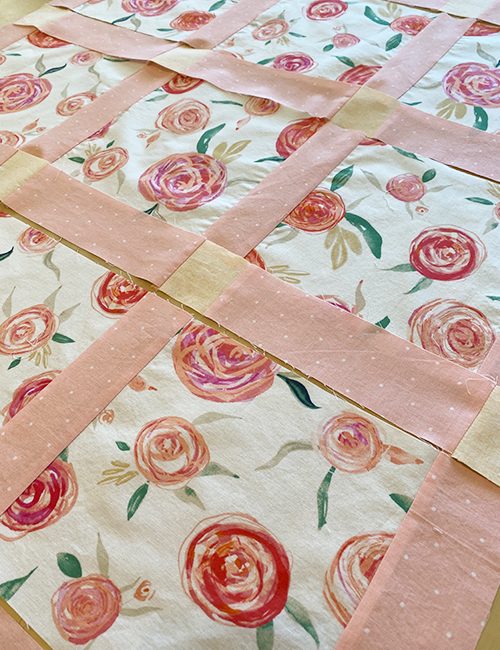
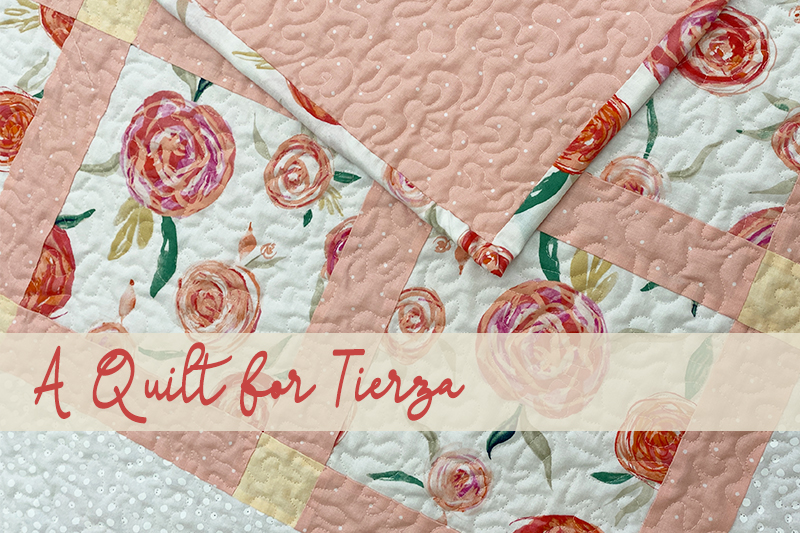
On Thursday, I went to Hobby Lobby to browse the fabric selection. I found this gorgeous floral print in coral pinks along with pink polka dot fabric, which seemed destined to be paired with it. I carried those two bolts around the entire fabric section looking for a couple more selections to include, but nothing else seemed to fit. So, off I went to JoAnn Fabrics and Crafts. (Two fabric stores in one day? Yes, please!)
I found the light peach and white-on-white fabric at JoAnn’s, selected two spools of a blush-colored thread for the quilting, made my purchases, and headed home. I washed all of the fabric that evening so I could get started in the morning.
Day 2: Getting started on the quilt
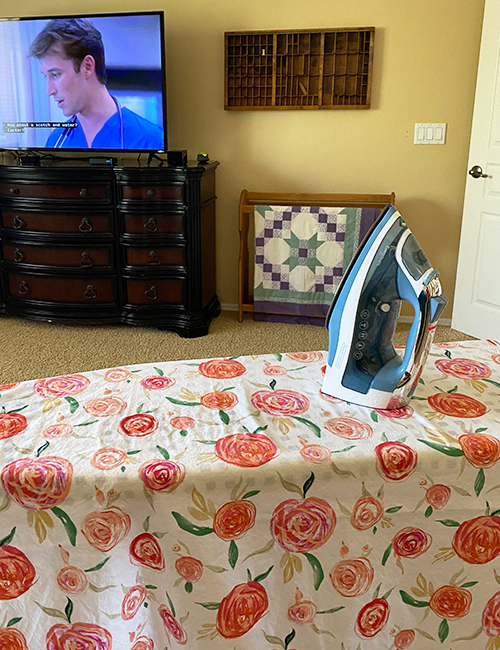
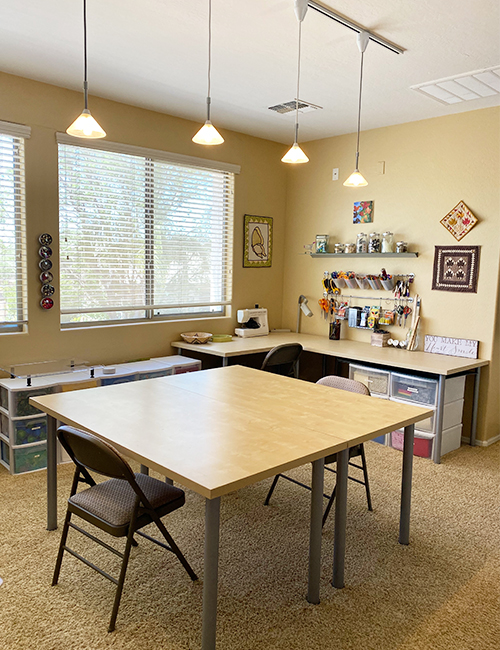
The first step Friday morning was to press all of the freshly laundered material. I was able to catch a few episodes of ER as I worked the wrinkles out. I then moved the ironing board and fabric to my sewing area in our loft.
When my daughters were young, I met several women at our church in Minnesota. While serving together in the children’s ministry, we connected as homeschool moms, discovered we shared a love of quilting, and quickly became friends. I have many happy memories of time spent with these sweet ladies—quilting, chatting about a variety of topics, encouraging one another, and sharing recipes and homeschool ideas. I learned a lot from each of them about life, motherhood, marriage, faith, and quilting, too!
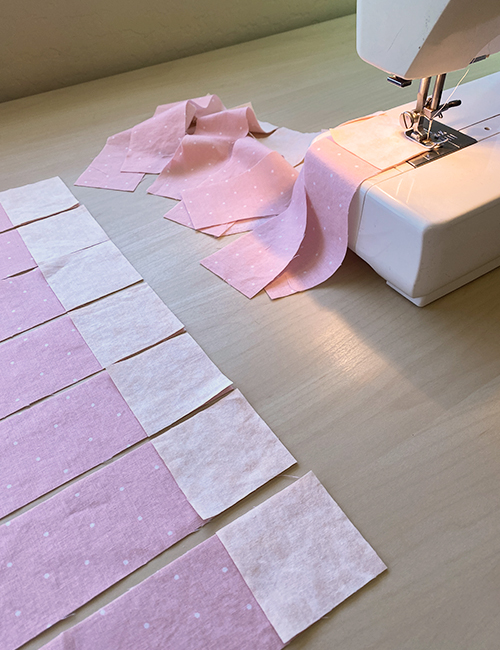
Chain piecing: a quilting timesaver
Years ago, my friend Buzzy taught me chain piecing, an efficient assembly-line method of sewing pieces and blocks together. Rather than sewing two pieces together, snipping the threads, going to the ironing board, and pressing them open one at a time, chain piecing is a real timesaver! It reduces thread waste, too.
I cut the fabric pieces and strips using my rotary cutter and mat, lined up groups of pieces next to my sewing machine, and started feeding them through one after another. I continued chain piecing until all of the rows were complete. Then, I sewed the rows together and add a border to create the finished quilt top.
It was fun to discover that so many of the great tips and shortcuts I’d learned so long ago came right back to me as I worked on this baby quilt—just like riding a bike! Sweet memories also came to mind as I worked. I’m so thankful for the precious friendships I enjoyed with that group of quilting, homeschool mamas nearly three decades ago.
Day 3: Machine quilting
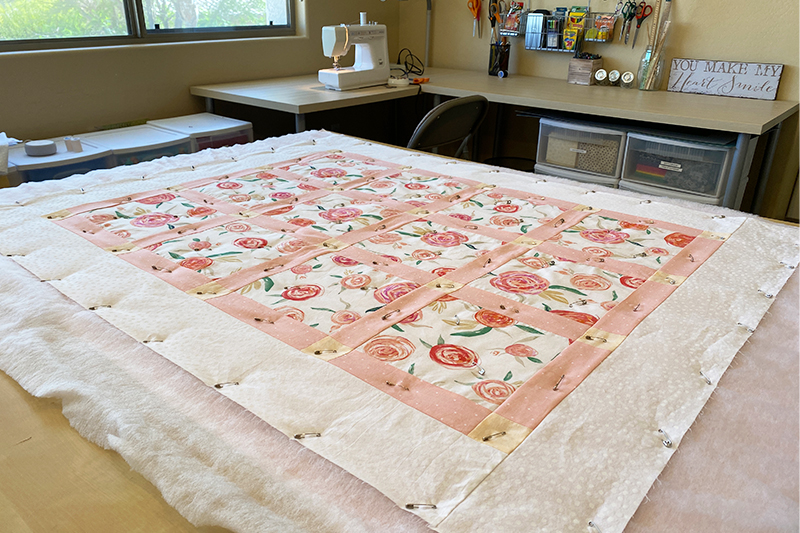
Saturday morning, I gave the quilt top and the backing a quick press and moved on to making the “quilt sandwich.” This baby quilt ended up being 40″x50″ and fit perfectly on my work tables.
With the backing fabric face down, then batting, and the quilt top face up, I pinned the three layers together with safety pins about 4″ apart. I checked the back to make sure there weren’t any puckers or distortions. Then it was time to for machine quilting.
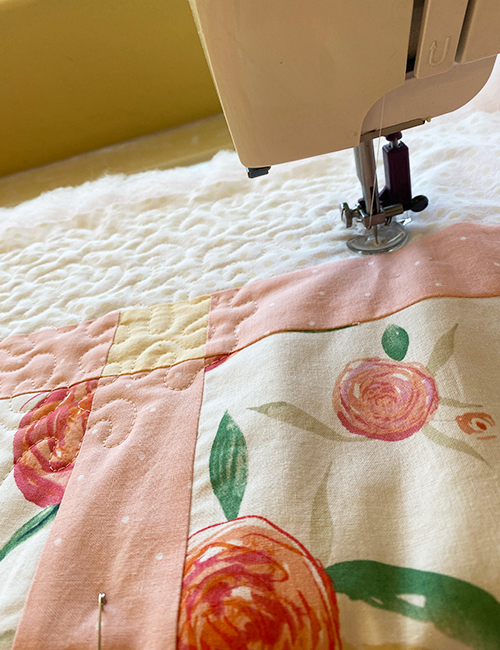
I have a faithful little Singer sewing machine I’ve used since my early days of quilting. I was really happy with how well it performed in spite of not being used for a few years. The tension held nicely and I didn’t have any issues at all.
A love of quilting shared with previous generations
In addition to sharing a love of quilts with my Grandma Ruth, my mom and I spent lots of time quilting together after she came to live with us in 2006. Oh how she and I loved fabric shopping together! I sure miss both of these dear women and all the fun we had.
When it comes to free-motion machine quilting, I have become pretty good at one pattern: stippling —which my mom and I affectionately referred to as amoebas. While listening to worship music, I spent the next several hours quilting a curvy path across the entire quilt. The rhythmic hum of the sewing machine is incredibly relaxing and provides the perfect opportunity to reflect and to pray, too.
Binding the quilt
After taking a quick dinner break, I cut strips of the floral fabric and sewed them together to create one long piece of binding to finish the edge of the quilt. I folded and pressed the binding in half lengthwise, wrong sides together. Using my sewing machine, I attached the binding to the front of the quilt, raw edges together.
The final step was to flip the folded edge of the binding to the back of the quilt and hand stitch it in place. For that handwork, I took the quilt, needle, and thread, and moved to a comfy chair and watched a movie while finishing the binding by hand.
A final wash and dry
Since I use cottons, I always pre-wash my fabric before cutting or sewing. This removes any sizing and takes care of any shrinkage that might occur.
If it’s a quilt that will be used as a blanket, I also wash the finished quilt. I use a dye-free, scent-free detergent and give it a quick machine wash and tumble in the dryer to make sure it looks just as good after it’s washed and dried.
The finished quilt
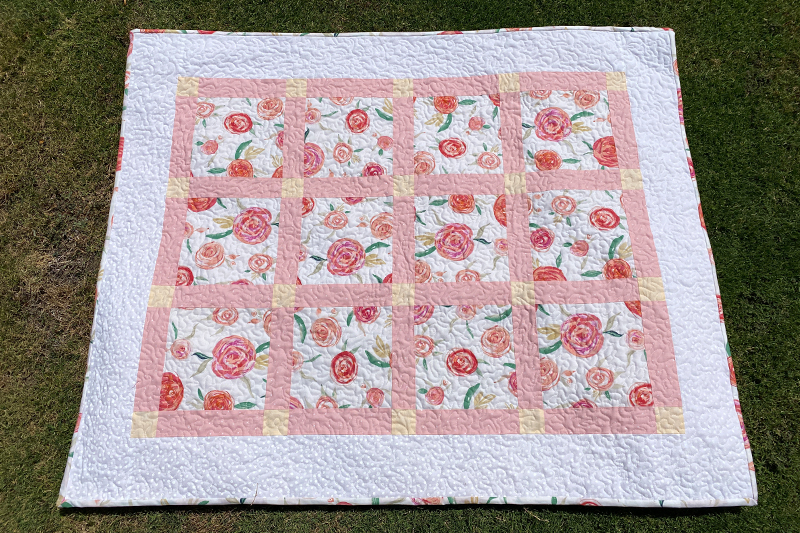
I’m so happy with how this quilt turned out. And it was a joy to deliver it to my friend and get to meet her sweet baby girl. Now to decide what my next project will be … so many possibilities!

I’ve always wanted to learn how to quilt… I did quite a bit of small sewing projects when the boys were really little, but never got up the nerve to try quilting. One of these days… G was so excited when I mentioned that you had made Tierza a quilt. She searched my bag and couldn’t stop gushing over the quilt.
Heather, that’s so sweet! It was WONDERFUL to see you and meet your beautiful baby.
Oh Nancy, what a beautiful quilt! How nice that you could make it for Heather and her baby girl! I cannot stipple well for the life of me; it hurts my brain, my shoulders, etc. You’re a natural. Your mama would be happy to see you carrying on the quilting tradition! Beautiful blog, by the way!
Thanks, Wendy! I was thinking a lot about my mom and all of the quilting we did together as I worked on this project. It made me smile to remember her. Your comment about stippling made me chuckle. I so badly want to learn something OTHER than stippling. It’s the only free-motion machine quilting I can do so far.
Oh Nancy, such talent, it’s a beautiful baby quilt.
My sister was an avid quilter, nowadays she has her hands busy with 3 grandchildren.
Thanks, Linda! That’s so fun about your sister, too!
Your words and quilt are simply lovely. I still treasure the one you made for Isaac 11 years ago ❤️
Thank you, Christina! I’m trying to remember that quilt … did it have turtles?
Oh Nancy, it is beautiful!!! I’m quite impressed with how quickly you got it done! Reading about all the steps brought back fond memories of our Quilting One Group and also of quilting with you and your mom. Remember when the “naughty” kitty batted at our design wall and sent many pieces of fabric tumbling to the ground and caused all three of us to exclaim loudly for him to stop!?! LOL We all laughed and began to retrieve the fallen squares and return them to the design board. Your friend is going to love this quilt!
Gail, yes, that quilting One Group at my house was such a special thing to share together, as well as other times we quilted or crafted together or just showed one another projects we were working on. What fun you, my mom, and I had together! I can’t remember which kitty caused that kerfuffle. Was it Hero, Rocky, or Mozart? Doesn’t surprise me at all. Those cats were indeed naughty and a lot of fun, too!
So beautiful! It’s on my list of things to learn with crocheting. You inspire my creative side!
Thanks, Valarie! It’s good to be inspired, isn’t it? Learning to crochet sounds fun!
Nancy, you certainly retained your quilting expertise over the years. The quilt you made for your friend’s daughter is absolutely beautiful. And you can feel the love that went into every stitch. I am so glad you are taking time to do some of the things you gave up for so many years. Love you.
Thank you, Sandy! It was a labor of love, for sure … with all joy that hardly felt like work at all!
That is so beautiful, Nancy! I used to quilt when I was a mom of one. It got put on the back burner when the next two came along. I hope to get back to it one day!
Thanks, Holly! I look forward to the day you do get back to quilting. 🙂
I love your stippling. I am pretty much a functional quilter (mine are not works of art but my grands seem to like their Blessing Blankets anyway) so the best I do is rows of hand quilting, enough to hold them together! Your stippling is beautiful, and your quilt is lovely!
Thanks, Vicki! Nothing wrong with being a “functional quilter” … those are gifts of love for your grandchildren. So special!
It’s beautiful! I used to quilt a bit, but after having my first baby, it was kind of impractical. I will probably make a quilt for my granddaughters when they get a bit older. My mom was a big quilter after she retired as a seamstress. She had a really fancy embroidery machine, and everything.
Making quilts for your granddaughters is a great idea, Debra! Next on my list is to make quilts for my grandboys. That’s so cool about your mom.
So many pleasures in this! The narrative which brought back so many memories of shopping for fabric with my mom and sister as we planned projects (none of us ever quilted, but we all sewed). The photos which let me vicariously participate. The joy in knowing Heather, Colene, and you would have over the exchange. Thank you!
Thanks, Julie!
Nancy, this is beautiful! The quilt, your words, and the peace you exude brings me such joy! Thank you for sharing your experience– I am inspired!
You’re so sweet! Thank you, Karly!